DIY Applique Heart Block - A Simple and Fun Valentine's Day Quilt Project
- Sondra Raby

- Feb 4, 2025
- 3 min read

Valentine's Day is just around the Corner- and who doesn't love making a quick project for someone you love!!
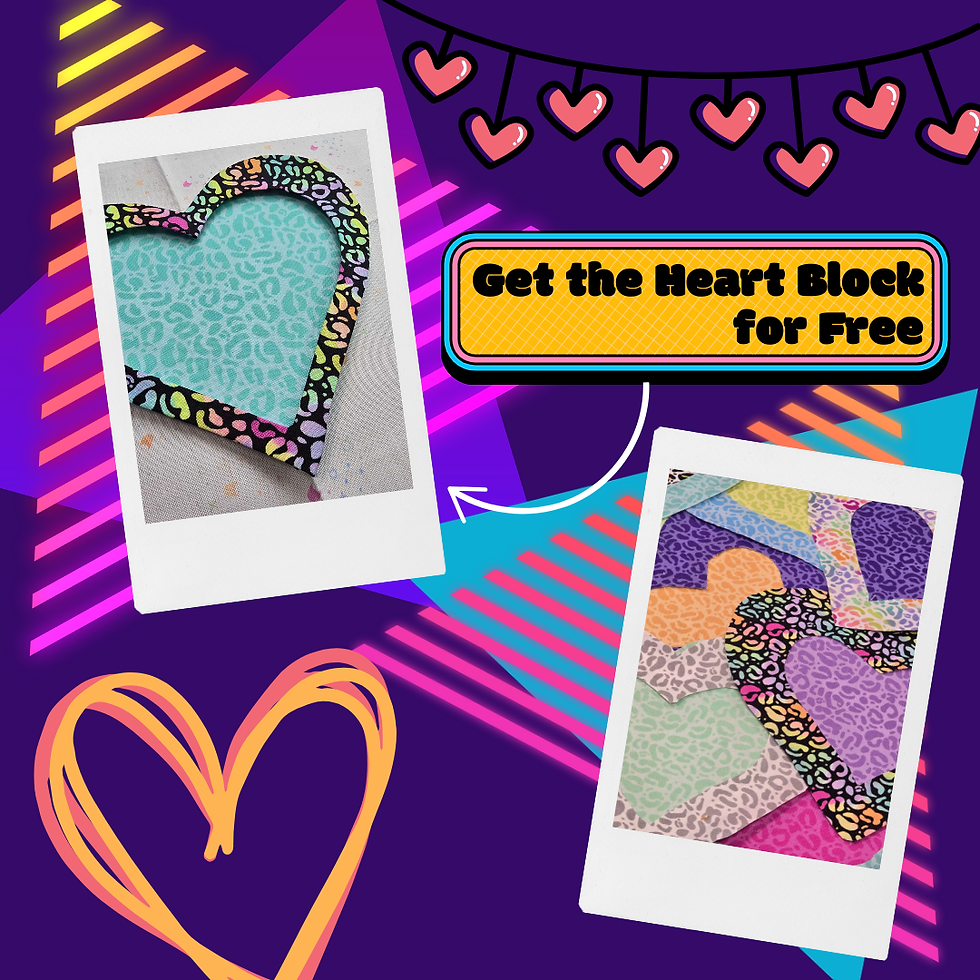
I recently fell in love with this new Fabric from Pammie Jane called WILD for Dear Stella fabrics, and let me tell you, it gave me the best retro vibes!!

I couldn't help but be reminded of the Lisa Frank folders from my youth with the bright contrasting colors and the fun take on a cheeta print.
So of course I decided to whip up some fun hearts to play with my new fabric. One of the things I wanted to make sure of though, was that I could utilize my 10 x 10 pack of fabric. Too often do I purchase a charm pack and have no projects to really use them in.
So whether you make 1 or 100- these DIY heart applique blocks are a quick project to whip up before Valentine's Day
My Gift To You~
If you'd make your own Heart Block, click on the button below to get the applique parts for FREE when you sign up for the AQD Newsletter
If you want to learn more about needle turn applique, check out our tutorial!
Getting Started with the DIY Applique Heart Block

Prepare your workspace

My go to tools:
3 pairs of scissors
paper
fabric
applique
Light Box
Marking Pens
Fusible Webbing
such as Heat n Bond lite for raw edge
or Hugs and Kisses for turn under
Iron
I prefer my smart Oliso iron, but any clean + hot iron will do
Silicone Mat
Gypsy Quilter mat pictured
Applique Instructions
* All applique shapes have been already reversed for ease
**images in this tutorial demonstrate turn under applique IF you need Raw Edge Applique instructions check out our detailed tutorial in The Rose Moon blog
1. Trace the included applique shapes onto fusible webbing using a Sharpie pen & light box or print directly onto your Hugs and Kisses sheets using specified instructions on
the package

Applique Tip-
Decide where you want to cut on your line and be consistent! For example- If you cut along the outside of the line, cut ALL shapes along the outside of that line.
This will help all of your shapes be the same proportion to each other and allow the overall applique image to fit together as intended
2. Cut traced shapes along the marked line

3. With WS of fabric up, iron traced shapes to corresponding fabrics, according to the
instructions found on your specific fusible webbing

4. Using a glue stick, apply glue to the edge of fusible and fabric, then gently finger press fabric over

5. Pin the inner heart to your background fabric

6. Stitch down along the outter seam - we choose a blanket stitch for this project

7. After inner heart is attached, carefully pin outter heart over

8. Repeat step 6- stitching both inner and outter seam of the outter heart

9. Your heart is now finished!! Create several blocks to create a banner or table runner. You could even add sashing to create a full quilt!
Applique is a great way to add expression to all sorts of things. Next time you have a jacket or pillow that needs spruced up, give it the applique treatmeant and see where it takes you!
Happy Stitching Friend,
Sondrasa


Comments